BY: JULIE DAECHSEL
Welcome to part two of “Dust, Rust, and All the Rest”. For those of you who missed part one, it can be found here. This final installment will recount the epic saga of Julie vs. the Cow Hair Trimmer, aka my first foray into conservation. During my time this summer as a Curatorial Collections Assistant at the Markham Museum, Janet Reid, the curator, arranged for conservator Miriam Harris (Professor of Cultural Heritage Conservation and Management at Fleming College) to lead a one-day conservation boot camp.
But what does a cow hair trimmer have to do with this? The short answer: it is a challenge I bested. The long (and less conceited) answer: Geared for Growing.
 |
| Source. |
Geared for Growing is the current exhibition at the Markham Museum and showcases innovations in farming. In the museum’s teaching collection is a cow hair trimmer: a device that uses a hank crank to power a hair trimmer.
Colour me surprised when Janet told me she wanted it in the upcoming (now current) exhibition. I’m assuming this shock showed on my face as she told me that since dairy farms have to be extremely hygienic cows need regular haircuts. How does a farmer achieve this standard? A cow hair trimmer.
Colour me surprised when Janet told me she wanted it in the upcoming (now current) exhibition. I’m assuming this shock showed on my face as she told me that since dairy farms have to be extremely hygienic cows need regular haircuts. How does a farmer achieve this standard? A cow hair trimmer.
 |
| Photo courtesy of Julie Daechsel. |
In the curatorial armour (aka a lab coat and gloves), I used the first weapon in my arsenal: a vacuum cleaner. BOOM – the cobwebs were gone (and so was the spider that crawled out). With a dry brush, I brushed as much dirt and dust into the vacuum attachment.
 |
| The various brushes in a conservator's toolkit. Source. |
 |
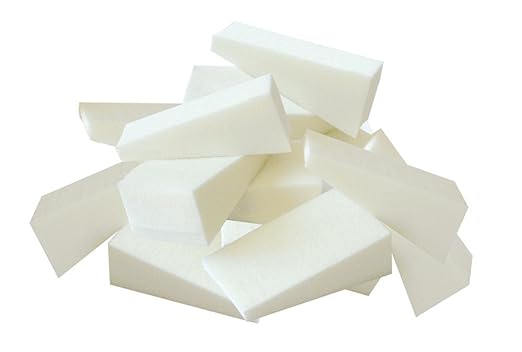
| Makeup sponges. Prepare yourself for a enormous pile of dirty ones. Source. |
 |
| Some scrapers. Source. |
 |
| The trimmer attachment. It was already broken when I got it, I swear. Photo courtesy of Julie Daechsel. |
Usually, it is not suggested to take apart what you are cleaning for two reasons: one, you may not know how to put it back together; and two, once the rust is removed, the pieces may not fit back together. The voice of experience (Janet) gave me the all-clear to remove the screw that held the blades together.
 |
| The trimmer blades after being removed from the trimmer. Photo courtesy of Julie Daechsel. |
 |
| These were super fun to use. Source. |
And ta-da! The beauty beneath the grime was revealed!
 |
| No more rust! Photo courtesy of Julie Daechsel. |
· Brush and vac: boring, but effective. Contain your excitement at the sight of a rusty object and take the time to dry brush and vacuum it first.
· Horde makeup sponges: incredibly effective and easy to use. Just change your sponge frequently!
· Scrapers and picks: never try this without permission. Any cleaning beyond light dirt removal requires permission from an experienced conservator. Play with different shapes and sizes to find the one with the perfect angle.
· Mineral spirits (aka paint thinner): removes nearly everything, which can be problematic. Remember, it will remove paint as well so avoid using it on certain surfaces.
· Lee Valley is a conservation goldmine
If you are nervous about conservation, practice on a less valuable object. A great way to dip your toe in the waters of conservation is to try cleaning a demo/teaching collection object: the stakes are much lower.
 |
| Finally in the exhibition! Photo courtesy of Julie Daechsel. |
 |
| Source. |


No comments:
Post a Comment
Note: only a member of this blog may post a comment.