Showing posts with label Canadian Conservation Institute. Show all posts

14 February 2019

MANAGEMENT SKILLS, ENVIRONMENTAL SCANNING AND GOSSIP: ALUMNI CHECK-IN WITH DEBORAH ROBICHAUD

Alumni Check-In | Elizabeth Cytko


Photo courtesy of Deborah Robichaud.

Deborah Robichaud graduated in 1980, in class 12 of what was then called the Master of Museology program at the University of Toronto. She has had a long and diverse career including acting as the Director of the Musée acadien, Director of Information and Extension Services at the Canadian Conservation Institute (CCI), and Regional Manager of Arts, Culture and Heritage for the Department of Canadian Heritage. She is currently retired and working on her own personal projects, including keeping on top of current museum trends. We conducted our interview over the telephone.

What was the Museology program like when you were a student?

A lot of our main museology courses were done at the ROM and we were encouraged to explore. We had a little bit of money in a petty cash type thing. Our Director at the time was David Newlands and I would go up to him and say “Hi! I would like to do this!”which he would let me do. Nobody else was using that little fund, it had to be related to our program. I got to see lots of things using it. I think one time we went to Detroit with a group from the AGO to visit a Turner exhibit. It was a day trip there and back, so it [included] bus fare and lunch.

How has the program changed from when you were a student?

When we took Museum Studies it was really to learn about how to do things. When we got out into the real world there was still a lot to be learned. At the very end of the course we had taken all this theory and done a little bit of practice. Then they realized we had no management skills! So we did a three day intensive management class – MBO- Managing By Objective – they brought in a management guru and then they sent us off into the world with three days of management skills. In many cases, we did not know how to run the business and we were expected to step into that type of a role.

Also, the discussion of community engagement, transparency, inclusiveness, and diversity of cultures is different now. None of that was talked about when we were there [at UofT]. If you look back between then and now those are some of the differences.

What are some of the greatest risks you have taken in your career?

Moving from museum work to the government was probably the biggest challenge for me because it’s a whole different world. It took a while to move from a curatorial role to the public servant role. There was no manual. For example, there’s a different way to write a letter in government than as a curator when you’re writing to another museum to find out about a particular artifact. Bringing your content skills to a government system you learn a lot through osmosis, trial and error. In the grants contribution world, you could be someone who knows a lot about grants and contributions but know nothing about the discipline. We often brought people into government who knew a lot about the discipline that we were giving grants for, but not about the government process. Unless you have both sides you don’t have a balanced team. You have people coming in from the non-government side wanting to help the community, but you still have government rules to follow. That was probably my biggest risk and also in a sense a bit of a regret because I could only live vicariously through other people’s projects. You knew somebody else would have success with an exhibition, and you think, “Great! The government enabled this by giving them money.” As a result, I did research projects and exhibitions throughout my career, not a lot, but the ones I did were the ones I really wanted to do and I continue to do that since I’ve retired.

What was one of your failures, or missteps, that turned into a great learning experience?

One of the things I learned really early is when you’re in a new job you think, “Oh I have this” and then all of a sudden something blindsides you. Then you realize, “Wow I didn’t really understand that at all.” When you think you’ve got it, you need to stop and have another reflection on whether you’ve looked at everything.

Another thing I learned is you can only repeat gossip if you’ve heard it three times from three different sources who are not related. The one time I didn’t do that (I didn’t get into trouble or anything) I was like darn, I should have followed my rule! But usually by the time you get it from three different sources everybody knows it anyways. This has served me well.


What advice would you give to museum professionals entering the sector today?

Environmental scanning. You should question, “What are the big issues in the world and how do they affect museums?” Changes in the world affect funding programs.

It’s about statues (such as with John A MacDonald) and a more open museum where you have more physical accessibility. With the #MeToo movement how do you incorporate that into a museum? Everybody in the museum world needs to be looking beyond the horizon on an ongoing basis. See the big trends, how they may affect your world and have a strategy already in place.

This interview has been edited for length and clarity.

12 October 2017

DUST, RUST, AND ALL THE REST: PART ONE

CONSERVATION TIPS & TRICKS

BY JULIE DAECHSEL

I love dust. I love rust. I love grime.

Source.
Before you question my sanity and scroll past this post, I let me explain – I love cleaning these things off an object. In this two part series, I’ll outline a practical beginner’s guide to conservation. By using stories from my time in the Markham Museum’s curatorial department, I’ll show you how to defeat dust, rust, and all the gross grime that attacks artifacts.

Part one will look at planning your war on dirt and part two will show you how to execute your plan and annihilate your foes.

Why conserve?
Removing layers of dirt and neglect from an object is insanely satisfying, and not just for the conservator. To the object, conservation is life or death (seriously): surface dirt and grime promotes deterioration, interferes with the aesthetics and the interpretation of an object, and attracts pests.

I think most people are more frightened of conservation than they should be. I’ll take this moment to clarify what I mean by “conservation” – it is by no means restoring an object to perfection. Cleaning an object doesn’t mean taking the object back to its original state: it means preventing further deterioration.

Definitely not the kind of cleaning I mean. Source.
Before cleaning, ask yourself...

Is it required? Does the object need to be cleaned?
Look at the object itself and how the museum (or entity that owns the object) wants to use it. If the object’s purpose depends on it being hygienic, then a deeper clean makes sense. Case in point: the curator of the Markham Museum, Janet Reid, restored a brass and chrome Babcock tester by removing layers of oxidation. Her goal was to clean it to a level appropriate for "Dairy Testing Clean", as it was a dairy testing tool. In consultation with Miriam Harris, Professor of Cultural Heritage Conservation and Management at Fleming College, it was determined that certain mechanical cleaners would be safe for both object and conservator.


Babcock tester from the Markham Museum after being restored. Layers of green corrosion were removed. Photo courtesy of Anna Kawecka.
The tester is now fully functioning as the corrosion was removed from all surfaces. Photo courtesy of Anna Kawecka.
What is a reasonable level of clean?
Determine how dirty the object is and what resources are available to you. Conservation is a lengthy and expensive process. So how do you balance the needs of the object with limited resources?
Triage the object: identify areas that need immediate attention (those that put the object in danger of irreversible damage) and areas that are not hazardous but not ideal. Figure out how much time and how many resources you can devote to the object. From there, it’s a matter of making a plan: the entire object needs to be brought to a uniform level of clean.

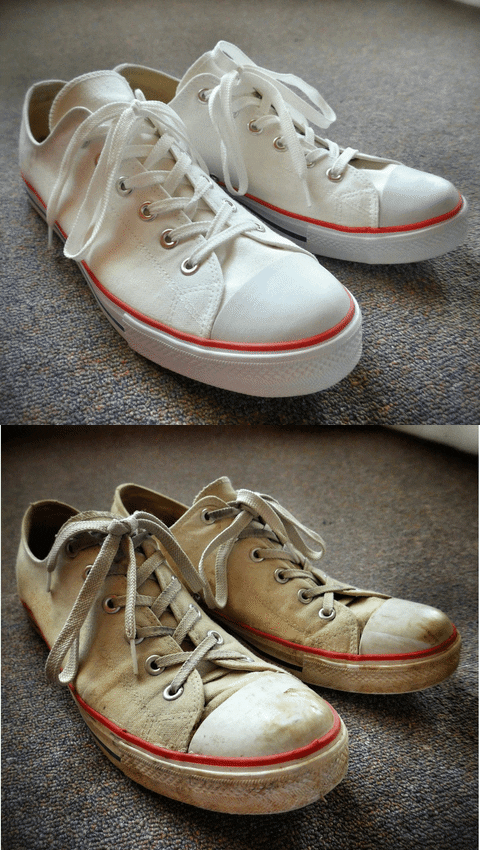
At the museum, Janet Reid wanted to add a cast iron horseshoe to an exhibition. Two hours were devoted during a busy exhibition installation to improve the appearance of this horseshoe (which was to be added to the upcoming exhibition) and stop the active corrosion. From a compromise between curatorial goals and conservation ideals, the horseshoe was taken from this:

Pretty gross, right? Photo courtesy of Julie Daechsel.


To this:

Two hours of conservation work. Photo courtesy of Julie Daechsel. 
Notice how it is uniformly clean? Equal amounts of time were spent cleaning every surface.

What is the dirt? How should it be removed?
Without intensive curatorial training, it’s next to impossible to look at an object and diagnose its dirt. Never blindly guess what dirt or corrosion is on your object: make an educated guess.

Look at where the object acquired its grime: was it outside, in a barn, in a basement? Could the grime be dirt, dust, or a combination? What is the object made of? When in doubt, ask other museum professionals: send a picture to the OMA listserv and wait for the responses to pour in. Museum professional love to share their wisdom and are only an email away. If you’ve identified the material, consult the CCI Notes before drafting your plan of attack.


Source.
But remember, never clean something without express permission from the object’s owner and never touch an object without complete confidence. Even the smallest inkling of uncertainty should give you pause.

Tune in to part two where I get down to the brass tacks (pun intended) of actually cleaning!

17 February 2017

TAKING A CALCULATED RISK: WHY ALL MUSEUMS SHOULD PREPARE RISK MANAGEMENT PROCEDURES

CONSERVATION TIPS & TRICKS

BY: KRISTEN MCLAUGHLIN

Risk Management Procedures

What is Risk Management? Well, originally, it's a term used by the insurance industry but is increasingly being used by cultural institutions, particularly when taking stock of ones collection. After evaluating a collection, steps can then be written up and taken to reduce the effects on collection in the event of a disaster.

Many museums are starting to implement risk management procedures in their procedures & policies collections. Why bother? Some may think. We don't have any disasters! There are no tornadoes or flood zones or earthquakes!


Risk management procedures can help museums plan for disasters that do affect them and help to take steps to protect their assets and resources. You don't need to plan for each and every one. But what about fire? What about a broken pipe that pours water on your artifacts in the dark backroom no one ever checks? What about theft, or for those that it does affect, earthquakes or floods?

It is important from a conservation standpoint to have a risk management procedure and policy in place and to make sure that all staff understand it. To prepare a write-up, the collections usually undergo a risk assessment. By undertaking this, there are two outcomes that should happen:

1. the creation of a risk management policy and procedure
2. steps to better protect collections as resources allow


Risk Assessment

A risk assessment is usually undertaken  by the team to determine what risks may apply and how to best reduce the risk to the collection. It can be formal or informal, entire collection or a portion, but it definitely should be done for a better understanding of not only the objects in the collection, but the storage procedures currently being used.

During a risk assessment, ask questions like:

-what is the probability of the event happening?
-what percentage of the collection is at risk from such an event?
-what would be the extent of the event?

According to the Canadian Conservation Institute, it is important to consider the 10 Agents of Deterioration when taking on a risk assessment and apply each agent against the collection.

1. physical forces (earthquake, vibration, dropping)
2. fire (flames, soot)
3. water (floods, leaks)
4. criminal (robbery, vandalism)
5. pests (rodents, insects) *
6. pollutants (dust, gases)
7. light and UV radiation
8. incorrect temperature
9. incorrect humidity
10. dissociation/custodial neglect


* many museums will create their own pest management procedure, otherwise known as IPM or Integrated Pest Management.

As risks are identified, they should be prioritized and evaluated for the best response. A good way of doing this is creating a chart and asking a series of questions that will place the events in that chart. Some examples of questions are: has the risk occurred before? What will make it more or less likely to happen again? Is immediate action required? Who is responsible for this risk?

Creating the Management Strategies

Once you prioritize the risk, make sure to create a strategy to respond to the risk. This would be in your risk management procedure.

Risk management strategies should use common sense and sound judgement. Do not make it too technical or convoluted with unnecessary steps. Remember, the strategies are to be implemented in the case of emergencies and often fast action would be required. The best way to prepare for it is to create a simple and common sense strategy from the get go.

Cost-effective strategies are what to focus on; everyone knows museums have limited resources, so plan for effective strategies that work within your budget! Risk management strategies do not have to be fancy. It can be as simple as moving a table away from a pipe that is known to leak sporadically, or strapping boxes down onto a shelf in an earthquake-prone zone.

Conclusion

According to the BC Museums Association Risk Management Best Practices, creating a risk management policy & procedure help the museum in many other policies and procedures, including

1. insurance
2. appraisals
3. security
4. occupational health and safety
5. natural disasters
6. definition and clarification of responsibilities of staff
7. compliance with pertinent legislation

Once you and your team undertake a risk assessment for your new risk management policy & procedure, you will begin to realize the interconnection of all of this integral issues in the museum. With a better understanding of the current state of your collections, responsibilities, and possible risk events, you will be able to better protect and care for your collection. It is a bit of an undertaking and writing the paperwork can be a lengthy task, but it is not just a conservation tip or trick; it's a conservation must.

Note: Remember to check and update the procedure and policy regularly, perhaps more than the others. And celebrate with your team once it is created! You've just taken a large step in protecting your collection! Whoo!


Here are some examples:

National Gallery of Canada Risk Management Policy

ICOM'S Guidelines for Disaster Preparedness

Collections Trust (UK) Risk Management Procedure


Sources:

American Museum of Natural History: Risk Assessment

Canadian Conservation Institute: Risk Management Workshop

Canadian Conservation Institute: Agents of Deterioration 

BC Museums Association: Risk Management Best Procedures

Museum SOS: Risk Management Applied to Preventative Conservation (Canadian Museum of Nature)

30 September 2016

DO-IT-YOURSELF: CONSERVATION CHEAT SHEETS

CONSERVATION TIPS AND TRICKS

BY: KRISTEN MCLAUGHLIN

To start off this year taking charge of this column, I thought long and hard about the title: Conservation Tips... There are so many out there! So many great institutes around the world write documents specifically for people like us: what type of damage is possible, how to repair/prevent damage on artifacts, proper storage, pest management, etc.

So what did I want to do for my first article to help contribute to this ever-expanding pool of strong conservation materials? I began to feel a heavy weight upon my shoulders... what can I, a student with nothing but a keen interest in conservation and very general experience, give to those who want to learn more?

 Source.

What I wanted was to create a resource that could be useful to people in a big picture sense, especially those who may not know where to start when it comes to conserving. This could be consultants, archaeologists, museum employees, local heritage professionals, or anyone with an interest in conservation!

So I came up with these babies: The Conservation Cheat Sheets (or more professionally--according to my document titles--Conservation 101 Sheets)! Actually, you can call them anything you want: Weird Looking Charts, Lots 'o' Lines, whatever you feel like. There are two: one for inorganic artifacts and one for organic. Below are their previews.


(c) Kristen McLaughlin


(c) Kristen McLaughlin

INORGANIC CONSERVATION PDF (with working links!)

ORGANIC CONSERVATION PDF (with working links!)

Say you have a basic conservation problem. Maybe you want a starting point to jump off from and Google is overwhelming you. All you have to do is open the handy dandy Conservation Cheat Sheets! You have a leather item that's so brittle it makes you nervous? Follow the lines to get to a useful source link. What about a piece of flaking pottery? No problem, just follow the path! Because that, my friends, is the destination. Each final result is actually a working link that will take you to the institution's webpage about said topic; usually there is even more useful information right on the page.

This means: the best part comes when you download them. You can then click the links at the bottom of your flowchart journey and bam, you have a place to start, a resource already in front of you.

So even though the images above may (generally) help you figure out the basic issue with your item, make sure to download them for clickability! Then you can keep them on your computer forever.

You can be a ninja conservator now! Whoo! Source.


PS: These charts are very general and are meant to be more like starting off points. There was no way I could possibly link to all of the sources I wanted to, nor delve into the more complicated problems and sub-problems that occur in the fascinating world of conservation (not at this point, anyway!). I hope these interactive charts help out at least a few of you as you embark on your conserving adventures!

Here are the sources I used for the PDFs:

Inorganic:

Texas A&M Institute: Cleaning of Iron (a variety of methods)

CCI: Tannic Acid Coating for Iron

The Archaeologist's Manual for Conservation (PDF): Iron Chapter

Texas A&M Institute: Cleaning Copper

SHA: Cleaning and Mending Ceramics

AIC: Dealing with Old Ceramic Repairs

Texas A&M Institute: Removal of Salts and Stains

SHA: Mending Glass

CCI: Cleaning Ceramic/Glass


Organic:

Los Angeles County Museum of Art (LACMA): Holes in Wool

Canadian Conservation Institute (CCI): Stitches in Textile Restoration

Smithsonian Institution: Mouldy Textile

CCI: Removing Mould from Leather

Texas A&M Institute: Brittle Leather

Society of Historical Archaeology (SHA): Consolidating Brittle Bone (scroll down to section)

Texas A&M Institute: Flaking/Dirty Bone/Ivory/Antler

CCI: Consolidating Wet Bone

Texas A&M Institute: Waterlogged Leather

Texas A&M Institute: Waterlogged Wood

Make sure to explore them further!